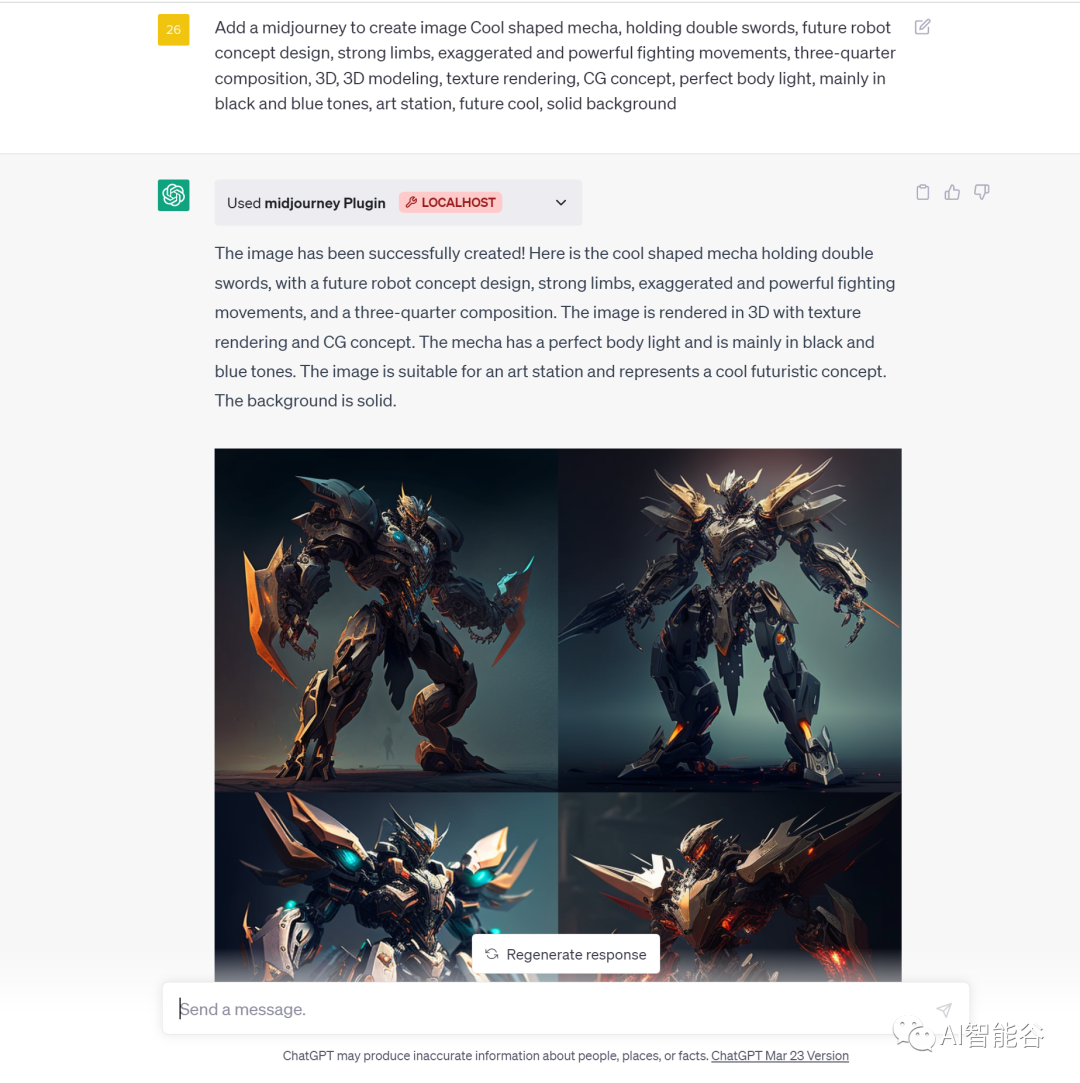
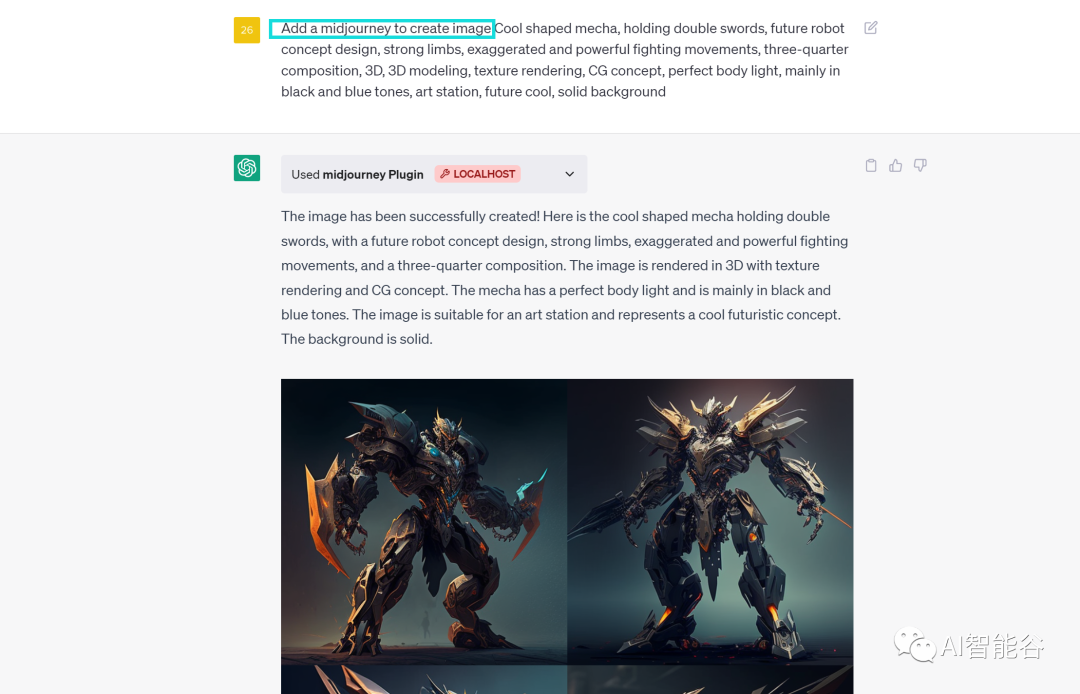
就在昨天体验了GPT-Plugins的强大后,博主连夜整合GPT-Plugins的Midjourney插件实现了在chatGPT中绘制图像的功能效果如下
现在介绍下插件开发的几个要点
1 构建插件清单
每个插件都需要一个
ai-plugin.json 文件,该文件需要托管在API的域中。例如,一家名为 example.com 的公司将通过 https://example.com 域访问插件JSON文件,因为这是他们的API托管的地方。当您通过GPT UI安装插件时,在后端我们会查找位于 /.well-known/ai-plugin.json 的文件。 /.well-known 文件夹是必需的,并且必须存在于您的域中,以便GPT与您的插件连接。如果找不到文件,则无法安装插件。对于本地开发,您可以使用HTTP,但如果您指向远程服务器,则需要HTTPS。本插件在开发中使用Java的springboot开发,将配置文件放到resources目录下

2 Ai-plugin.json 配置解析
{ “schema_version”: “v1”, “name_for_human”: “TODO Plugin”, “name_for_model”: “todo”, “description_for_human”: “Plugin for managing a TODO list. You can add, remove and view your TODOs.”, “description_for_model”: “Plugin for managing a TODO list. You can add, remove and view your TODOs.”, “auth”: { “type”: “none” }, “api”: { “type”: “openapi”, “url”: “http://localhost:3333/openapi.yaml”, “is_user_authenticated”: false }, “logo_url”: “http://localhost:3333/logo.png”, “contact_email”: “support@example.com”, “legal_info_url”: “http://www.example.com/legal”}
-
schema_version: 配置文件的版本,这里是 “v1″。 -
name_for_human: 插件的人可读名称,这里是 “TODO Plugin”。 -
name_for_model: 插件的模型可读名称,这里是 “todo”。 -
description_for_human: 插件的人类可读描述,说明这是一个用于管理待办事项列表的插件,可以添加、删除和查看待办事项。 -
description_for_model: 插件的模型可读描述,与description_for_human相同。 -
auth: 插件的身份验证类型,这里是 “none”,表示不需要身份验证。 -
api: 插件的API相关信息。-
type: API类型,这里是 “openapi”。 -
url: API的URL,这里是 “http://localhost:3333/openapi.yaml”。 -
is_user_authenticated: 用户是否已通过身份验证,这里是 false。
-
-
logo_url: 插件的logo图片URL,这里是 “http://localhost:3333/logo.png”。 -
contact_email: 插件的联系电子邮件,这里是 “support@example.com”。 -
legal_info_url: 插件的法律信息URL,这里是 “http://www.example.com/legal”。
这里可以可以重点关注到api 字段,因为api就是执行我们插件操作全部功能可以看到这里指向了一个配置文件叫openapi.yaml。下面我们重点解析下配置文件openapi.yaml
3 Openapi.yaml 配置解析
openapi: 3.0.1info: title: TODO Plugin description: A plugin that allows the user to create and manage a TODO list using GPT. version: ‘v1’servers: – url: http://localhost:3333paths: /todos: get: operationId: getTodos summary: Get the list of todos responses: “200”: description: OK content: application/json: schema: $ref: ‘#/components/schemas/getTodosResponse’components: schemas: getTodosResponse: type: object properties: todos: type: array items: type: string description: The list of todos.
这些就是openapi.yaml 接口文件这里详细介绍下各个参数含义
info:title/description/version
info.title代表插件名称,info.description代表插件描述都将在此显示
servers(服务)
这里指向的是服务器的地址,在这里我理解是本地调用是http,如果调用远程是https。(可能有误)
paths(路径)
这里是指请求接口的路径/todos 表示指向接口的名称,get表示请求参数为GET请求
summary(总结)
这个参数比较重要,应该代表触发插件的提示词,GPT才知道这是要请求哪个具体的接口
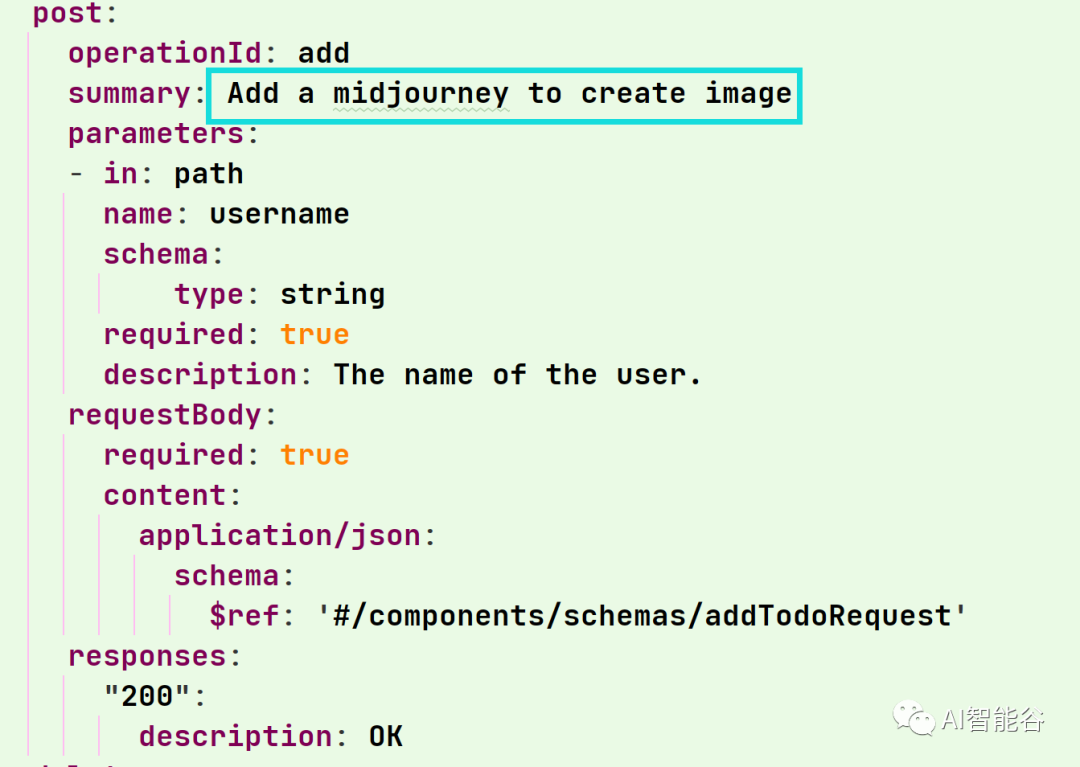
parameters(参数)
这就代表我们传入的参数类型,这里设置string类型参数
requestBody(返回值)
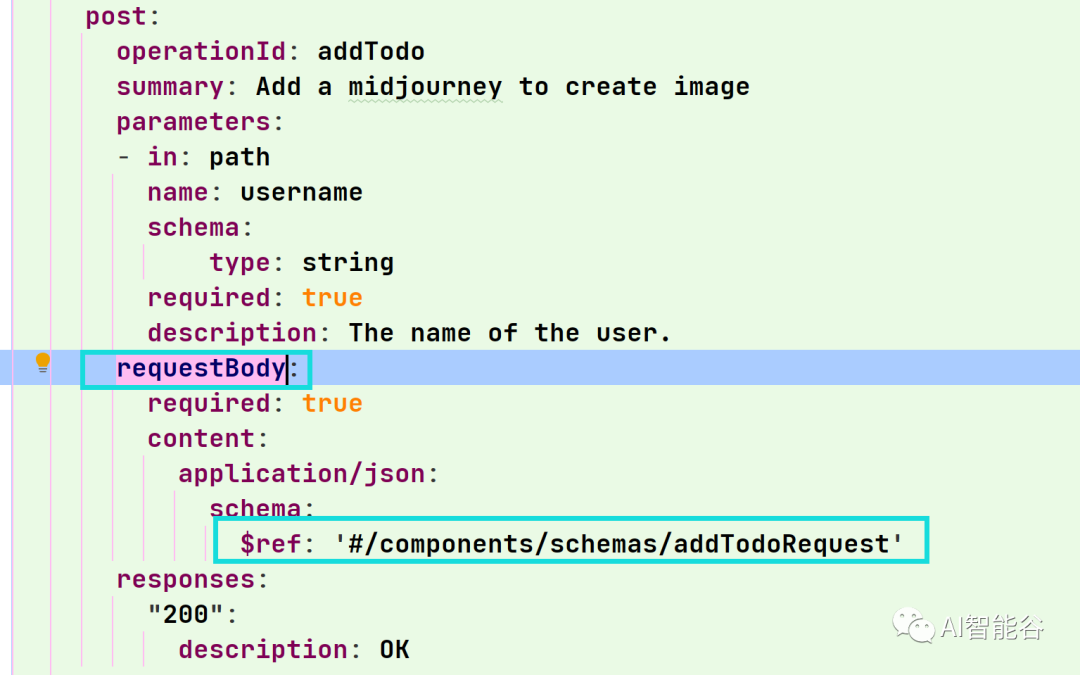
这里将返回值指向一个实体可以看到对应的路径下就有当前的返回对象
4 构建代码

因为openAi的规定在导入插件时会检查我们的配置文件以 https://example.com/.well-known/ai-plugin.json形式进行读取。我们就提供给他们这个接口。保证能将我们的配置文件信息返回
构建业务代码
剩下的就我们可以引入自己的业务代码,与openapi.yaml文件的对应即可
5 安装插件
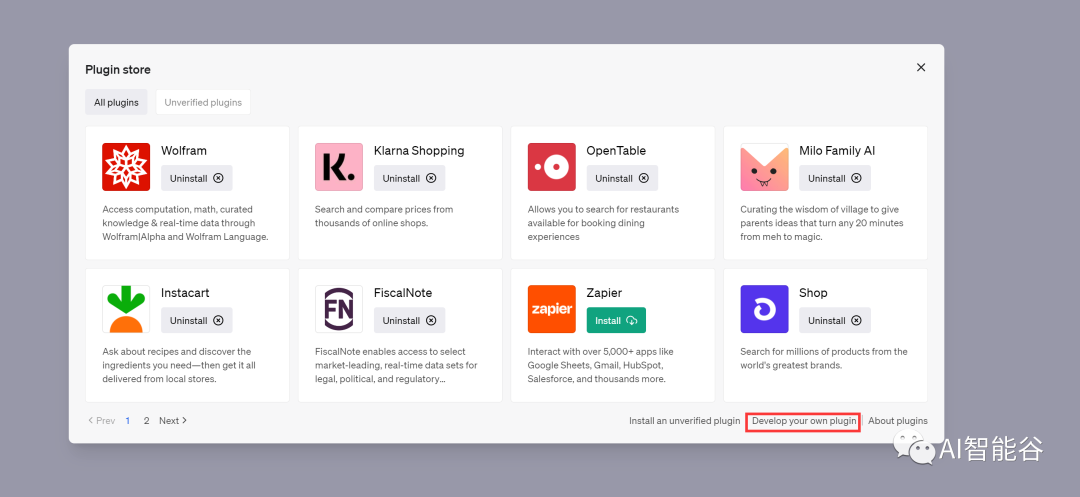
打开插件栏选择Develop your own plugin,这里openAi为我们提供了本地插件开发的功能
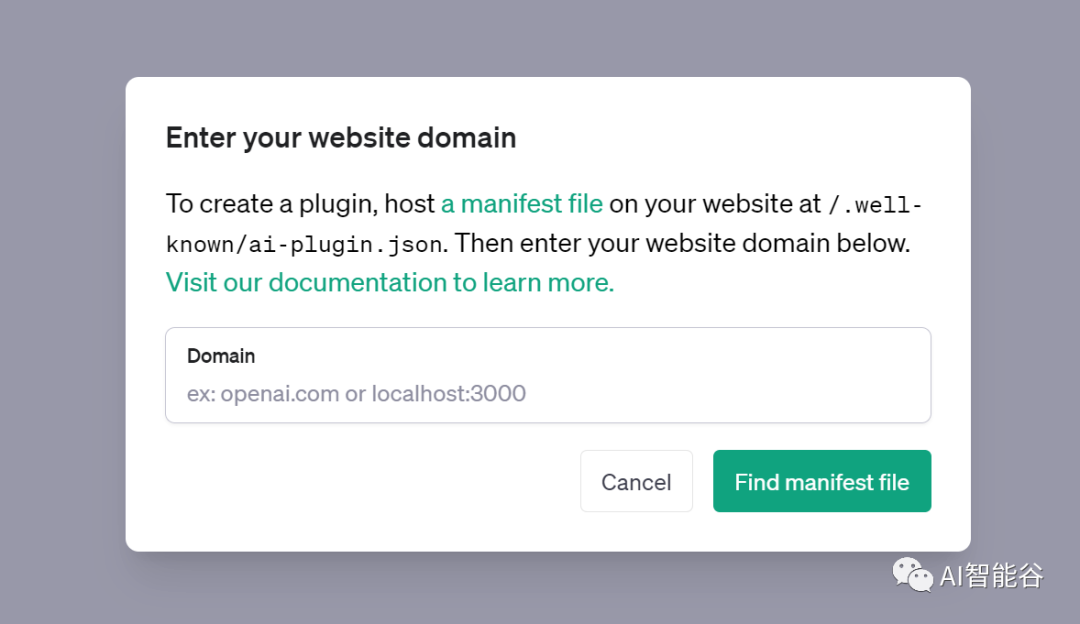
填写我们的本地服务地址,然后安装即可
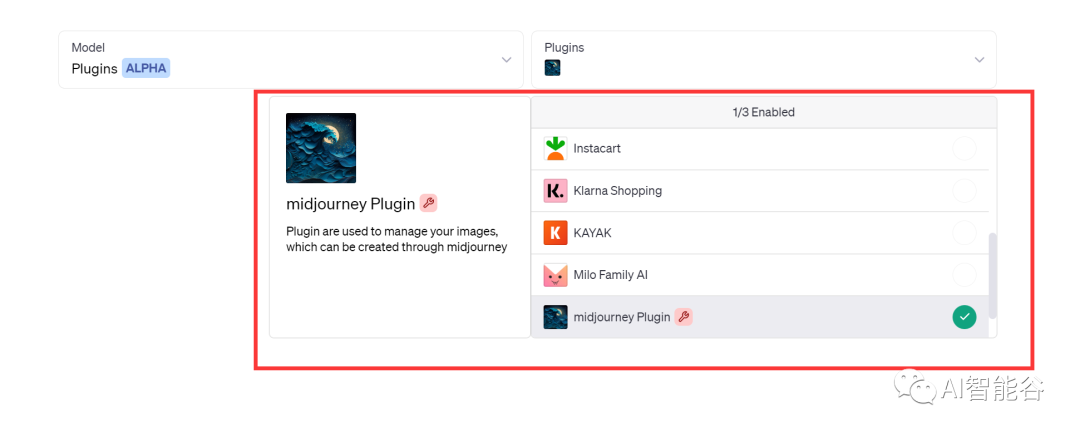
最后我们可以在插件这里选择我们自己开发的插件使用。
© 版权声明
文章版权归作者所有,未经允许请勿转载。
相关文章
暂无评论...
国内极具人气的AIGC交流学习平台,主要收集国内外Ai网站,及Ai热点资讯,尽在益丰AI!